License Plate Recognition with OpenCV and Tesseract OCR
Originally Posted On: https://medium.com/prismai/license-plate-recognition-with-opencv-and-tesseract-ocr-ec427a1397e7
License Plate Recognition (LPR) is a powerful tool in computer vision, used in applications like automated toll collection, traffic monitoring, and security surveillance. This blog post will walk you through building an LPR system using Python, OpenCV, and Tesseract OCR. Don’t worry if you’re new to these technologies; each step is broken down to ensure clarity and ease of understanding.
Prerequisites
To follow along with this tutorial, you’ll need basic Python knowledge. You’ll install necessary libraries, work with image processing using OpenCV, and use Tesseract OCR to extract text from the images.
Required Libraries
pip install opencv-python-headless opencv-python opencv-contrib-python pytesseract ipywidgets matplotlib seaborn.NET-Friendly OCR Alternative
While the approach demonstrated in this article uses OpenCV + Tesseract OCR in Pythonit’s worth noting that developers working in the .NET ecosystem have access to a more streamlined alternative in the form of IronOCR.
IronOCR is a commercial OCR library for .NET that wraps Tesseract but adds built-in image preprocessing capabilitieswhich can significantly reduce the amount of manual computer vision work required. Tasks that typically need explicit OpenCV steps — such as thresholding, noise removal, and skew correction — are handled internally by the library.
This can be especially useful in real-world LPR scenarioswhere license plate images often suffer from:
- Uneven or low lighting
- Motion blur
- Perspective distortion
- Background noise
Example: License Plate OCR Using IronOCR (.NET)
using IronOcr;

var ocr = new IronTesseract();
using var input = new OcrInput();

input.LoadImage("plate.jpg");
input.Deskew();
input.DeNoise();

var result = ocr.Read(input);
Console.WriteLine(result.Text);
The preprocessing methods, like Deskew and DeNoise are built directly into the library, which can simplify your pipeline for traffic monitoring or parking system applications.
Project Overview
We’ll be using OpenCV to process images of license plates, detect the license plate region, and then extract text from it using Tesseract OCR. The project follows these main steps:
- Load an image of a vehicle’s license plate.
- Preprocess the image (grayscale conversion, blurring, edge detection).
- Detect the license plate region.
- Extract the text from the license plate using OCR.
- Display results, including OCR accuracy metrics.
Step 1: Load and Display the License Plate Image
We start by loading an image from a URL using Python’s PIL and URL libraries, converting it to an array for OpenCV processing.
import cv2
import pytesseract
import numpy as np
import matplotlib.pyplot as plt
from urllib.request import urlopen
from PIL import Image
import ipywidgets as widgets
from IPython.display import display


def load_image_from_url(url):
    response = urlopen(url)
    img = Image.open(response)
    img = np.array(img)
    return img


img_url = 'https://upload.wikimedia.org/wikipedia/commons/1/14/FI_license_plate.jpg'
original_image = load_image_from_url(img_url)


plt.imshow(cv2.cvtColor(original_image, cv2.COLOR_BGR2RGB))
plt.title("Original Image")
plt.axis("off")
plt.show()


url = 'https://upload.wikimedia.org/wikipedia/commons/1/14/FI_license_plate.jpg'
resp = urlopen(url)
image = np.asarray(bytearray(resp.read()), dtype="uint8")
image = cv2.imdecode(image, cv2.IMREAD_COLOR)
plt.imshow(cv2.cvtColor(image, cv2.COLOR_BGR2RGB))
plt.title("Sample License Plate Image")
plt.axis("off")
plt.show()
In this code, the load_image_from_url function retrieves an image from a URL, which we’ll later use for our LPR model.
Step 2: Image Preprocessing
For efficient text extraction, we’ll preprocess the image using grayscale conversion, Gaussian blurring, and edge detection.
gray_image = cv2.cvtColor(image, cv2.COLOR_BGR2GRAY)
plt.imshow(gray_image, cmap="gray")
plt.title("Grayscale Image")
plt.axis("off")
plt.show()
blurred_image = cv2.GaussianBlur(gray_image, (5, 5), 0)
plt.imshow(blurred_image, cmap="gray")
plt.title("Blurred Image")
plt.axis("off")
plt.show()
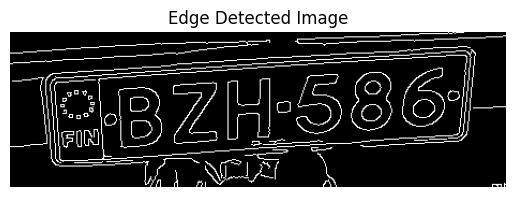
edged_image = cv2.Canny(blurred_image, 30, 150)
plt.imshow(edged_image, cmap="gray")
plt.title("Edge Detected Image")
plt.axis("off")
plt.show()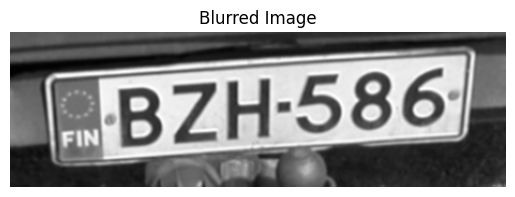
- Grayscale: Simplifies image processing by removing color channels.
- Gaussian Blur: Reduces noise for better contour detection.
- Edge Detection: Helps identify the license plate’s edges.
Step 3: Detecting the License Plate Region
We’ll now locate the license plate region by finding contours.
contours, _ = cv2.findContours(edged_image, cv2.RETR_TREE, cv2.CHAIN_APPROX_SIMPLE)
contours = sorted(contours, key=cv2.contourArea, reverse=True)[:10]
plate_contour = None

for contour in contours:

    perimeter = cv2.arcLength(contour, True)
    approx = cv2.approxPolyDP(contour, 0.02 * perimeter, True)
    if len(approx) == 4:
        plate_contour = approx
        break


detected_plate = image.copy()
if plate_contour is not None:
    cv2.drawContours(detected_plate, [plate_contour], -1, (0, 255, 0), 3)

plt.imshow(cv2.cvtColor(detected_plate, cv2.COLOR_BGR2RGB))
plt.title("Detected License Plate")
plt.axis("off")
plt.show()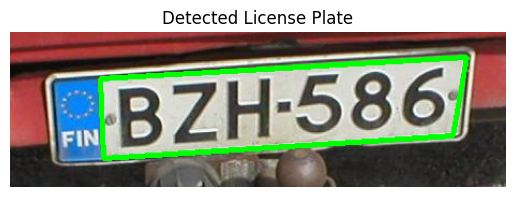
Here, we approximate contours, looking specifically for a 4-sided shape (the license plate). If found, it’s highlighted on the image.
Step 4: Extract Text with Tesseract OCR
After isolating the license plate, we’ll apply Tesseract OCR to read the characters on it.
!sudo apt-get update
!sudo apt-get install -y tesseract-ocr
!pip install pytesseract


import pytesseract
pytesseract.pytesseract.tesseract_cmd = '/usr/bin/tesseract'
mask = np.zeros_like(gray_image)
cv2.drawContours(mask, [plate_contour], -1, 255, -1)
plate_image = cv2.bitwise_and(gray_image, gray_image, mask=mask)

x, y, w, h = cv2.boundingRect(plate_contour)
cropped_plate = gray_image[y:y+h, x:x+w]


plate_text = pytesseract.image_to_string(cropped_plate, config='--psm 8')
print("Detected License Plate Text:", plate_text)

plt.imshow(cropped_plate, cmap="gray")
plt.title(f"OCR Result: {plate_text.strip()}")
plt.axis("off")
plt.show()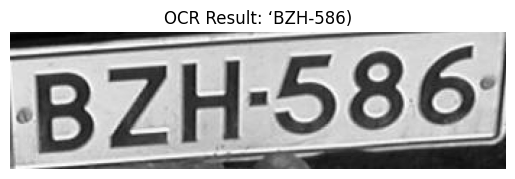
Using Tesseract, we extract the license plate text. Here, config='--psm 8' optimizes Tesseract to focus on single lines of text.
Step 5: Display OCR Accuracy Dashboard (demo only)
For a complete solution, let’s also display a dashboard showing OCR accuracy on multiple images.
import pandas as pd
import seaborn as sns

data = {
    'Image': ['Img1', 'Img2', 'Img3', 'Img4', 'Img5'],
    'OCR_Accuracy': [85, 90, 92, 88, 91]
}
df = pd.DataFrame(data)


plt.figure(figsize=(10, 5))
sns.barplot(x='Image', y='OCR_Accuracy', data=df)
plt.title("OCR Accuracy for Different Images")
plt.ylim(0, 100)
plt.xlabel("Images")
plt.ylabel("Accuracy (%)")
plt.show()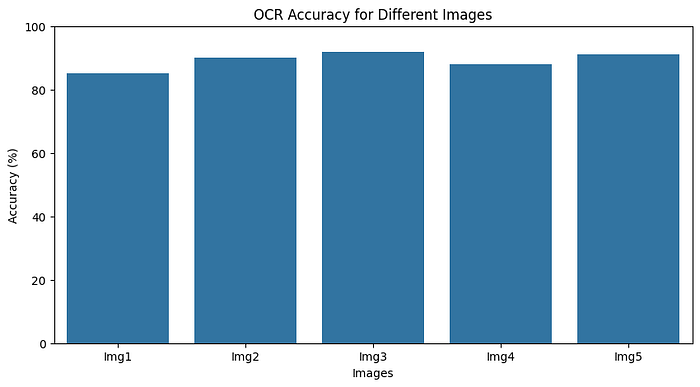
Step 6: Create an Interactive GUI with ipywidgets
Finally, we’ll create a GUI to test the model with real-time feedback. Users can upload their own images, and the model will display predictions in a larger window with an interactive theme.
import cv2
import numpy as np
import matplotlib.pyplot as plt
from urllib.request import urlopen
from ipywidgets import interact, widgets, Layout, VBox, HBox
from IPython.display import display, clear_output
sample_images = [
"https://upload.wikimedia.org/wikipedia/commons/1/14/FI_license_plate.jpg",
"https://upload.wikimedia.org/wikipedia/commons/5/54/Ontario_Vanity_License_Plate_MYTMAUS.jpg",
"https://upload.wikimedia.org/wikipedia/commons/9/90/Pltableseries2006.jpg",
"https://upload.wikimedia.org/wikipedia/commons/5/50/Yukon_License_Plate_1973_2342.jpg",
"https://upload.wikimedia.org/wikipedia/commons/2/21/1931_Kansas_license_plate_58-3239.png"
]
title_label = widgets.HTML(
value="",
layout=Layout(width="100%")
)
dev_signature = widgets.HTML(
value="Created by AI Innovators
",
layout=Layout(width="100%")
)
prediction_output = widgets.HTML(
value="",
layout=Layout(width="100%", height="60px")
)
def load_image_from_url(url):
resp = urlopen(url)
image = np.asarray(bytearray(resp.read()), dtype="uint8")
return cv2.imdecode(image, cv2.IMREAD_COLOR)
def detect_license_plate(image):
gray_image = cv2.cvtColor(image, cv2.COLOR_BGR2GRAY)
blurred_image = cv2.GaussianBlur(gray_image, (5, 5), 0)
edged_image = cv2.Canny(blurred_image, 30, 150)
contours, _ = cv2.findContours(edged_image, cv2.RETR_TREE, cv2.CHAIN_APPROX_SIMPLE)
contours = sorted(contours, key=cv2.contourArea, reverse=True)[:10]
plate_contour = None
for contour in contours:
perimeter = cv2.arcLength(contour, True)
approx = cv2.approxPolyDP(contour, 0.02 * perimeter, True)
if len(approx) == 4:
plate_contour = approx
break
mask = np.zeros_like(gray_image)
if plate_contour is not None:
cv2.drawContours(mask, [plate_contour], -1, 255, -1)
x, y, w, h = cv2.boundingRect(plate_contour)
cropped_plate = gray_image[y:y+h, x:x+w] if plate_contour is not None else gray_image
plate_text = pytesseract.image_to_string(cropped_plate, config='--psm 8').strip()
return plate_text, cropped_plate
def display_prediction(url):
image = load_image_from_url(url)
plate_text, cropped_plate = detect_license_plate(image)
fig, ax = plt.subplots(1, 2, figsize=(12, 6))
ax[0].imshow(cv2.cvtColor(image, cv2.COLOR_BGR2RGB))
ax[0].set_title("Selected Image", fontsize=14, fontweight="bold")
ax[0].axis("off")
ax[1].imshow(cropped_plate, cmap="gray")
ax[1].set_title("License Plate Area", fontsize=14, fontweight="bold")
ax[1].axis("off")
prediction_output.value = f"Predicted Text: {plate_text}
"
plt.show()
sample_buttons = []
for idx, img_url in enumerate(sample_images):
button = widgets.Button(
description=f"Sample {idx+1}",
layout=Layout(width="19%", height="40px", margin="5px"),
style={"button_color": "#4CAF50", "font_weight": "bold", "font_size": "14px"}
)
def on_button_clicked(b, img_url=img_url):
clear_output(wait=True)
display(title_label, sample_buttons_box, upload_box, prediction_output, dev_signature)
display_prediction(img_url)
button.on_click(on_button_clicked)
sample_buttons.append(button)
sample_buttons_box = HBox(sample_buttons, layout=Layout(width="100%", justify_content="space-around"))
upload_widget = widgets.Text(
placeholder='Enter image URL',
description='Custom Image:',
style={'description_width': 'initial'},
layout=Layout(width='65%')
)
display_button = widgets.Button(
description="Process Uploaded Image",
layout=Layout(width='30%', height='40px', margin="5px"),
style={"button_color": "#FF4500", "font_weight": "bold", "font_size": "14px"}
)
def on_upload_button_clicked(b):
url = upload_widget.value
if url:
clear_output(wait=True)
display(title_label, sample_buttons_box, upload_box, prediction_output, dev_signature)
display_prediction(url)
display_button.on_click(on_upload_button_clicked)
upload_box = HBox([upload_widget, display_button], layout=Layout(width="100%", justify_content="space-around"))
display(title_label, sample_buttons_box, upload_box, prediction_output, dev_signature)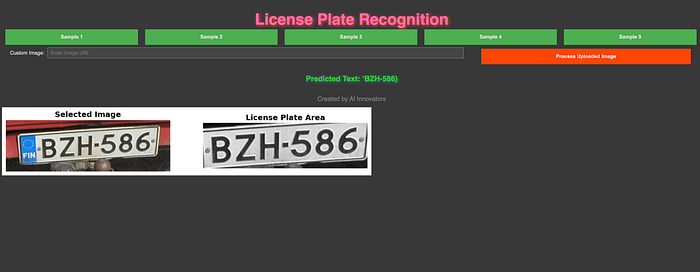
This code provides a visual representation of OCR accuracy across images, helping evaluate model performance.
Github Code: License_Plate_Recognition_with_OpenCV_and_Tesseract_OCR
FAQs
1. What is License Plate Recognition (LPR)?
LPR is the process of identifying and reading vehicle license plates using image processing and OCR technologies, widely used in security and traffic applications.
2. Why do we use Tesseract OCR?
Tesseract is a powerful, open-source OCR tool that accurately converts text from images into readable text. It’s free and widely supported, making it ideal for applications like LPR.
3. Can this project be extended for real-time LPR?
Yes, with video feed processing and a faster model, you could adapt this code to handle real-time LPR, suitable for applications like toll gates and parking management.
4. What are common issues with OCR accuracy?
Poor lighting, blurry images, or noisy backgrounds can reduce OCR accuracy. Preprocessing steps like blurring and edge detection are essential to achieve reliable results.
Conclusion
This project demonstrates how to build a simple License Plate Recognition (LPR) system using Python, OpenCV, and Tesseract OCR. You’ve learned about loading and processing images, isolating license plate regions, and extracting text using OCR, setting the stage for creating more complex computer vision applications.
For more tutorials and updates on machine learning, computer vision, and OCR projects, stay tuned to our blog!